Creating a ringtone for your iPhone's ringtone is a great way to personalize it. To make an iPhone ringtone out of any song, you have a range of solutions available to you. Some of them are free, some are not.
In this article, you will find several different ways to create ringtones for your iPhone.

In this article, you will find several different ways to create ringtones for your iPhone.
- Create a Ringtone Using iTunes
- Creating iPhone Ringtones Online
- Creating iPhone Ringtones Using Software
- Create Ringtones Using QuickTime Player
- Preparing Your Track Using iTunes
- Using QuickTime Player
- Create Ringtones Using GarageBand
Create a Ringtone Using iTunes
To begin, open your iTunes and make sure that you are using the most updated version of the software. Next, select the song that you are going to use, and identify the 30-second portion that you would like to use as a ringtone.
Right-click on the song file, and go to Song Info:

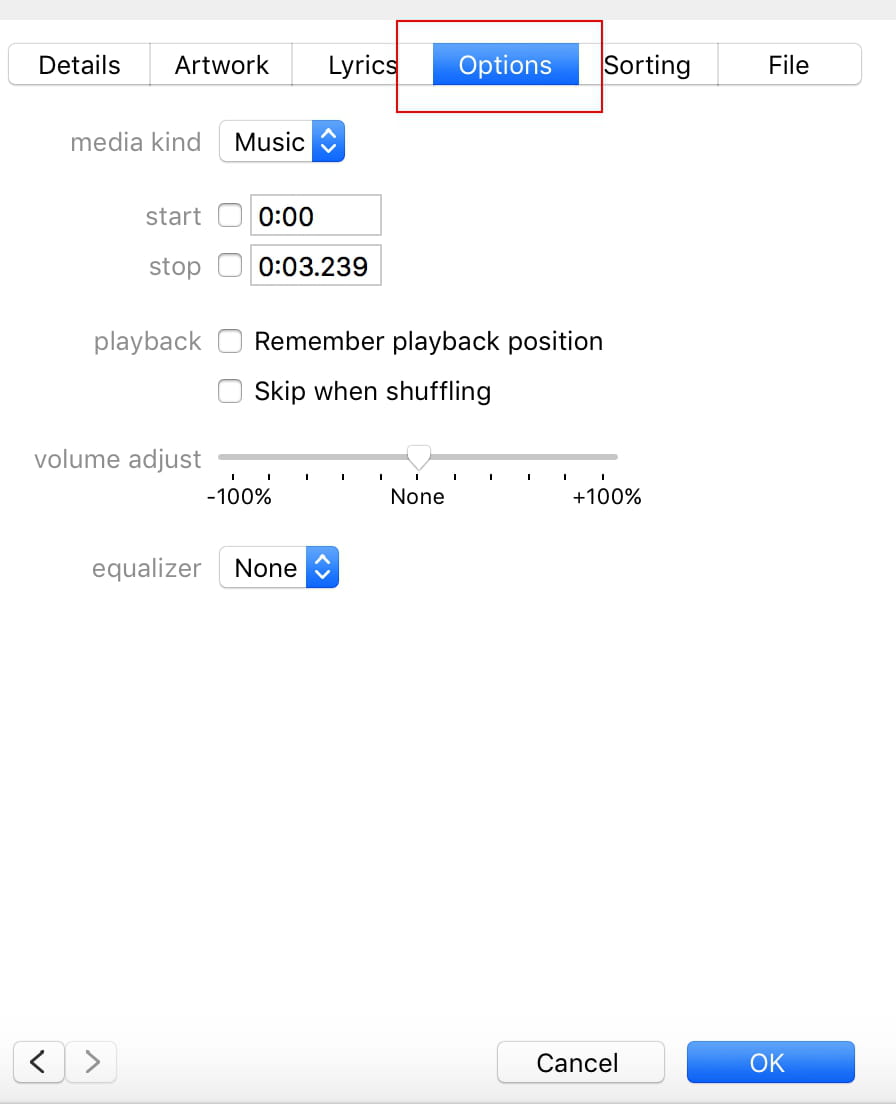
Now, click the Options tab:

Scroll to the Start and Stop fields, and enter the start and stop times of the 30-second portion of your selected song:

When you're done, click OK at the bottom of the screen:

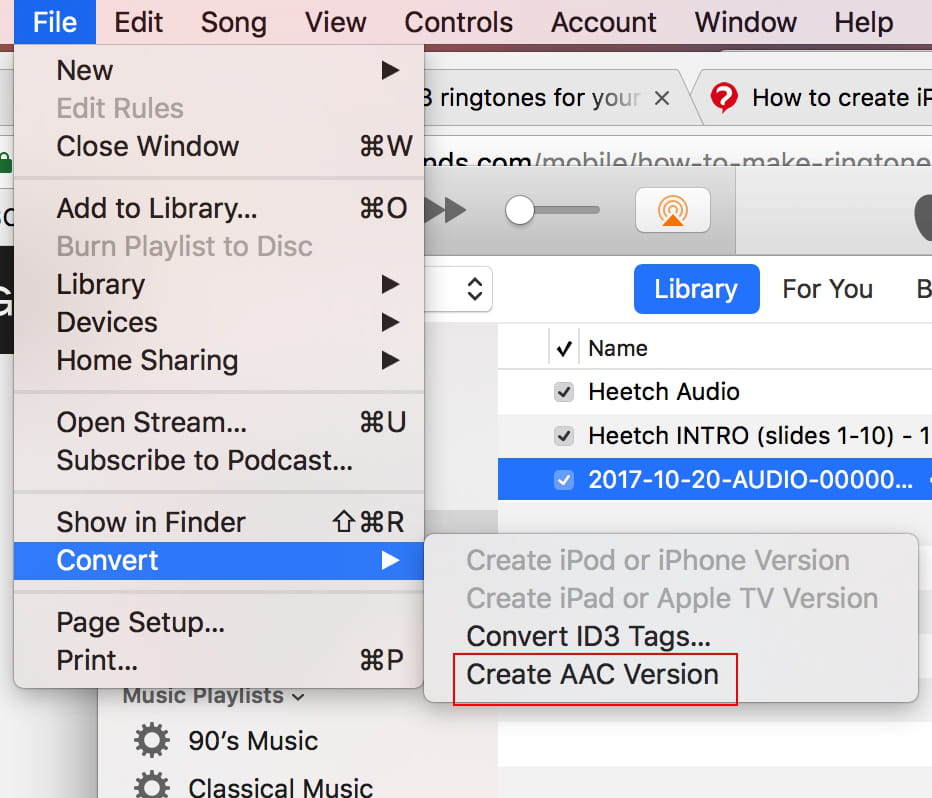
Now, you'll need to create an AAC version of your song. To do this, go to File > Convert > Create AAC version:

Copy the AAC file that has now appeared in your iTunes library onto your desktop. When you've placed it there, change the file extension from m4a to m4r. Confirm your changes in the prompt that pops up.
The last step is adding the file to your phone. To do this, go back to iTunes, and click the iPhone icon near the top-left corner:

Then, under the Summary section, scroll down to Options. Check the box next to Manually manage music and videos:

Click Done in the bottom-right corner to save your changes:

Now, drag the .m4r file from your desktop into the Tones tab under On My Device. Doing so will automatically sync the ringtone with your iPhone:


Next, check that the file kind is AAC audio file:

Now, copy the AAC file from your iTunes library and paste it onto your desktop. Once you've placed it, edit the file's extension from m4a to m4r. Confirm your changes in the dialog box that pops up.

Click Edit > Trim, then using your trackpad or mouse, drag the ends of the selection to set the portion of the track to be used as a ringtone (max. 29 seconds). Now, click Trim:

Click File > Save, and uncheck the Hide Extension option:

Rename the file with the .m4r extension, and import the file into iTunes. It will automatically be recognized as a ringtone for iPhone.

Now, import an audio file into the project from the Finder or from the Media Browser. You can also import a MIDI file from the Finder. Or you can create the ringtone audio right in the program.
When the project sounds about right, set the cycle area to cover the part of the project that you want to use for the ringtone. This must be less than 40 seconds long. If it exceeds this length, GarageBand will shorten it automatically.
Click Share > Ringtone to iTunes to export the song as a ringtone to your iTunes library. There, you'll be able to sync it to your phone.

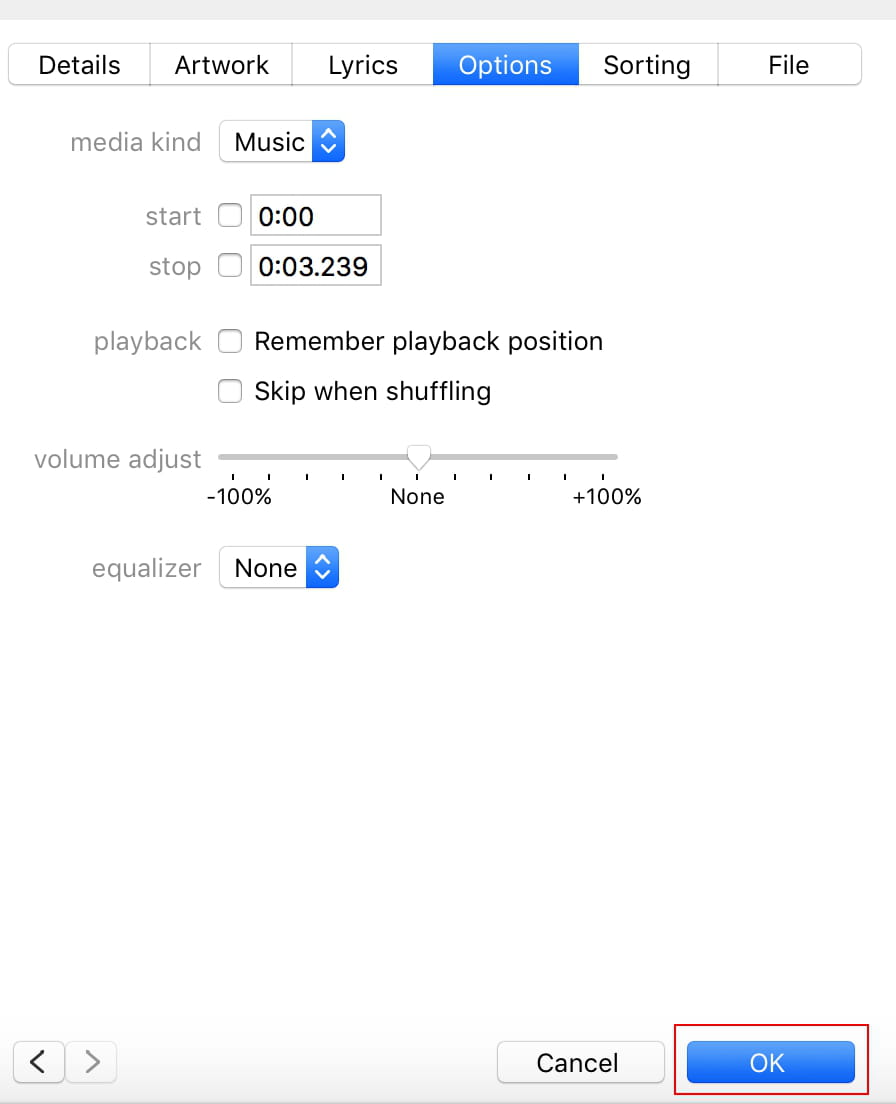
Now, click the Options tab:
Scroll to the Start and Stop fields, and enter the start and stop times of the 30-second portion of your selected song:

When you're done, click OK at the bottom of the screen:
Now, you'll need to create an AAC version of your song. To do this, go to File > Convert > Create AAC version:
Copy the AAC file that has now appeared in your iTunes library onto your desktop. When you've placed it there, change the file extension from m4a to m4r. Confirm your changes in the prompt that pops up.
The last step is adding the file to your phone. To do this, go back to iTunes, and click the iPhone icon near the top-left corner:

Then, under the Summary section, scroll down to Options. Check the box next to Manually manage music and videos:

Click Done in the bottom-right corner to save your changes:

Now, drag the .m4r file from your desktop into the Tones tab under On My Device. Doing so will automatically sync the ringtone with your iPhone:
Creating iPhone Ringtones Online
If you're looking for a free and easy way to create iPhone ringtones, there are several online websites that you might find useful. One of the most popular ones is Myxer, which allows you to create ringtones from any song on your PC and to download ringtones that have been created by other users.
Creating iPhone Ringtones Using Software
You can use dedicated software to create ringtones for your iPhone. AVS Ringtone Maker allows you to easily create ringtones for free. Another free software that you can use to make iPhone ringtones is iRinger, which makes it quite easy to create and save ringtones from your PC.
Create Ringtones Using QuickTime Player
Preparing Your Track Using iTunes
Open the iTunes program, and identify the 30-second musical track that you would like to make into a ringtone. Now, right-click on it, and go to Song Info > File:Next, check that the file kind is AAC audio file:

Now, copy the AAC file from your iTunes library and paste it onto your desktop. Once you've placed it, edit the file's extension from m4a to m4r. Confirm your changes in the dialog box that pops up.
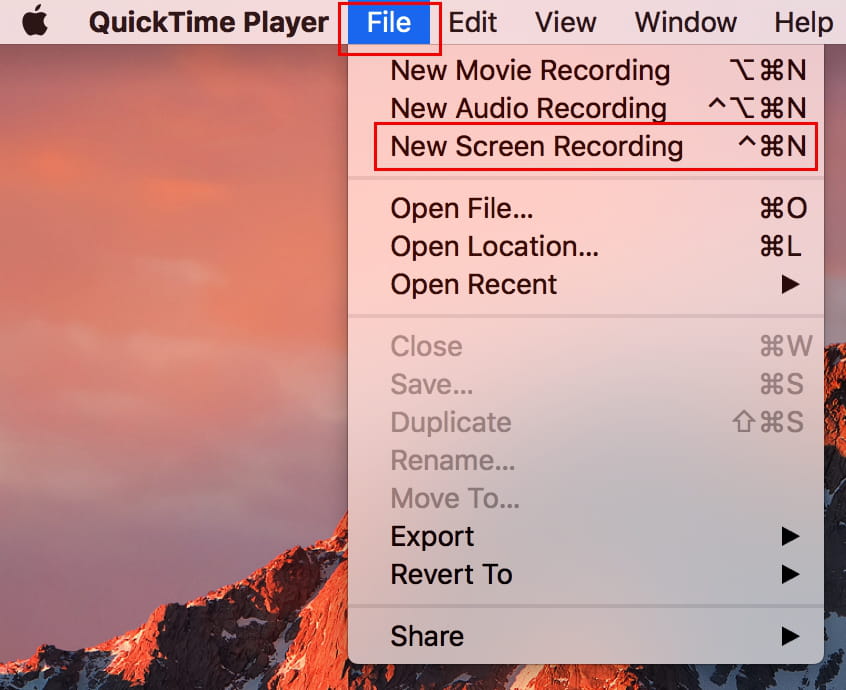
Using QuickTime Player
Launch the copied file with QuickTime Player by right-clicking on it and selecting Open With:
Click Edit > Trim, then using your trackpad or mouse, drag the ends of the selection to set the portion of the track to be used as a ringtone (max. 29 seconds). Now, click Trim:

Click File > Save, and uncheck the Hide Extension option:

Rename the file with the .m4r extension, and import the file into iTunes. It will automatically be recognized as a ringtone for iPhone.
Create Ringtones Using GarageBand
Open GarageBand, and select Ringtone:
Now, import an audio file into the project from the Finder or from the Media Browser. You can also import a MIDI file from the Finder. Or you can create the ringtone audio right in the program.
When the project sounds about right, set the cycle area to cover the part of the project that you want to use for the ringtone. This must be less than 40 seconds long. If it exceeds this length, GarageBand will shorten it automatically.
Click Share > Ringtone to iTunes to export the song as a ringtone to your iTunes library. There, you'll be able to sync it to your phone.